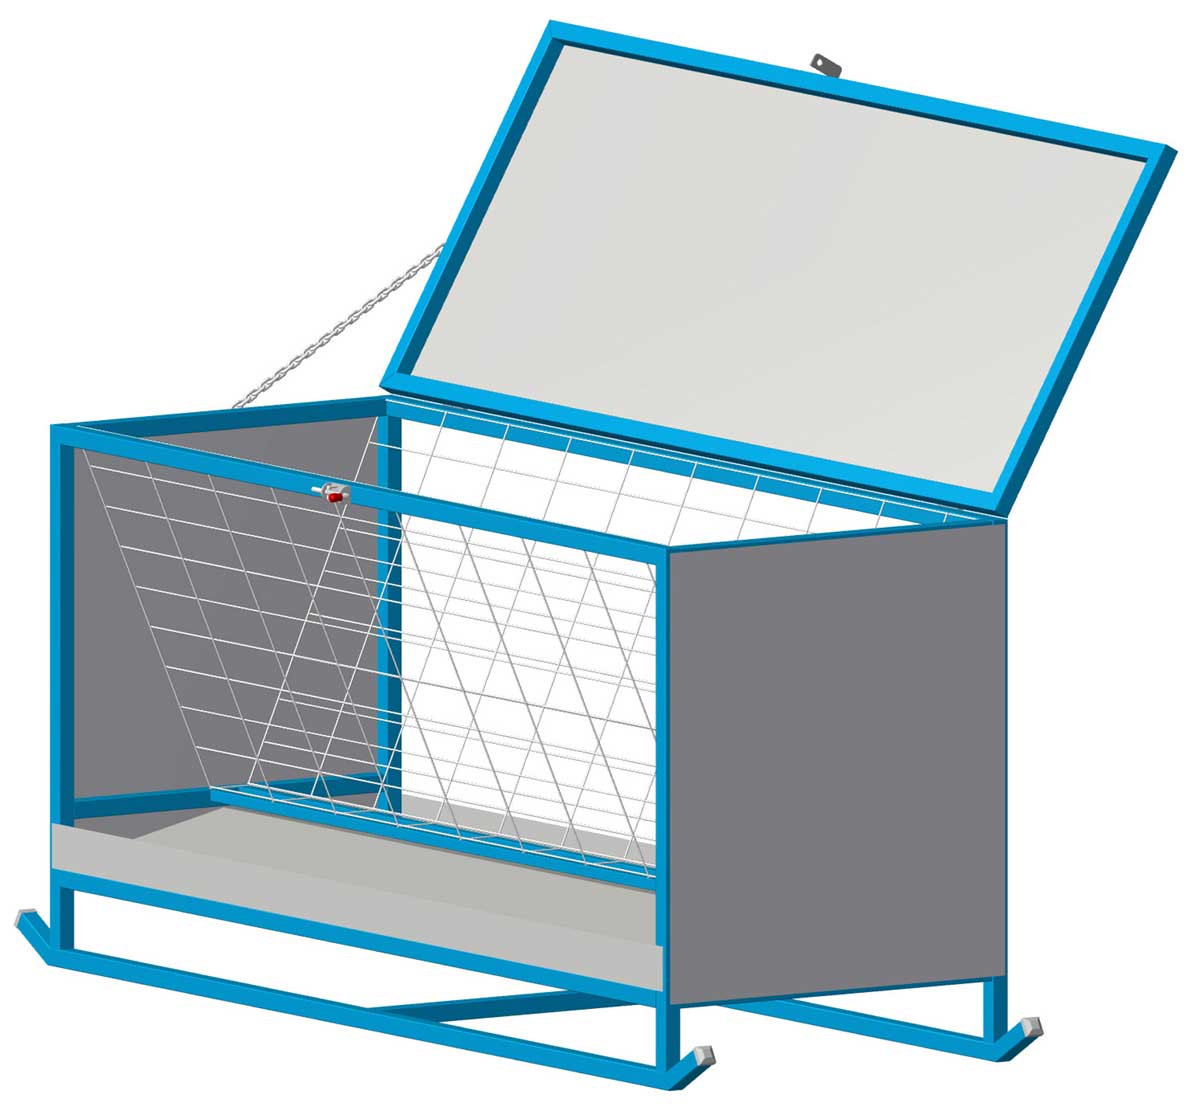
The hay feeder is an essential part of the farm equipment inventory. It allows the hay to be available to your livestock as they require it, keeps it off the ground so that the animals don’t spoil it and with the addition of the roof, minimises the chance of the hay getting wet.
Free Steel 8 Foot Hay Feeder Plans

| Materials Required | |||
|---|---|---|---|
| Item Number | Material | Length | Quantity |
| 1 | 40x40x2.0 SHS | 1160mm | 4 |
| 2 | 40x40x2.0 SHS | 2500mm | 2 |
| 3 | 40x40x2.0 SHS | 150mm | 4 |
| 4 | 40x40x2.0 SHS | 2460mm | 2 |
| 5 | 40x40x2.0 SHS | 820mm | 2 |
| 6 | 40x40x2.0 SHS | 820mm | 1 |
| 7 | 40x40x2.0 SHS | 820mm | 2 |
| 8 | 40x40x2.0 SHS | 820mm | 2 |
| 9 | 25x25x2.0 SHS | 2380mm | 4 |
| 10 | 40x40x2.0 SHS | 2460mm | 2 |
| 11 | 40x40x2.0 SHS | 900mm | 2 |
| 12 | 40x40x2.0 SHS | 820mm | 1 |

Diagram 1
1. Begin by cutting all of the steel as indicated in the cutting list. Label each with the item number on it using a marking pen and set aside. Take note of the mitre cuts for the SHS to ensure that they are cut the correct way.
2. Tack weld the front frame as shown in diagram 1. Check that the frame is square and fully weld. Repeat for the rear frame.
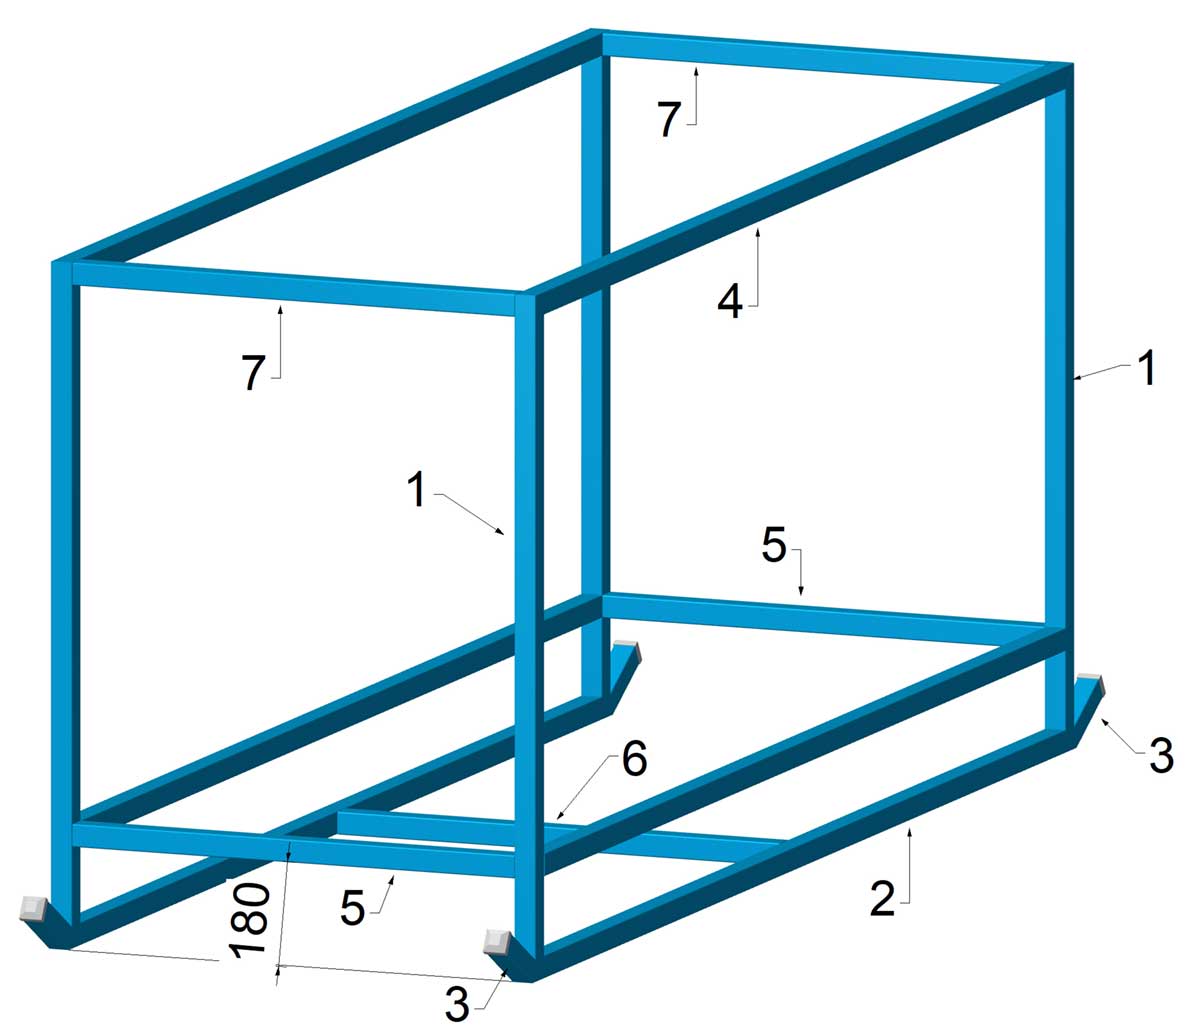
Diagram 2
3. Secure the front and rear frame in an upright position and tack weld items 5, 6 and 7 as shown in diagram 2. The lower edge of items 5 should be 180mm up from the ground and item 6 should be installed in the centre of the front and rear frames.
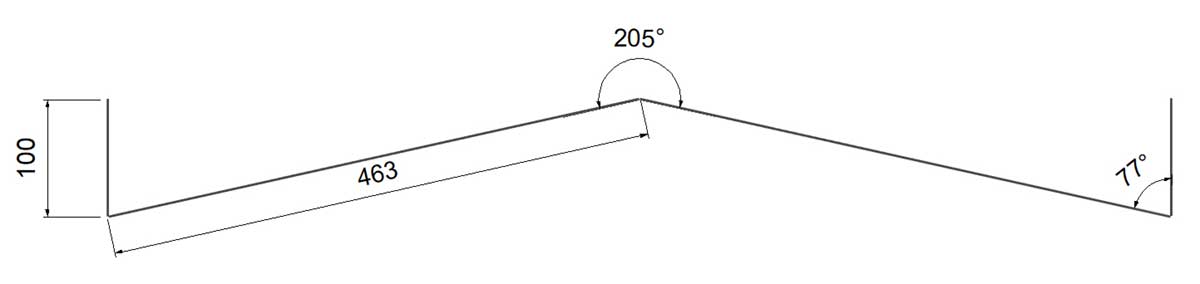
Diagram 3
4. Cut and fold sheet for the tray as shown in diagram 3. The length of the sheet is 2440mm.

Diagram 4
5. Cut notches in the corners of the sheet approximately 45mm x 45mm square. These are to fit around items 1.

Diagram 5
6. Install the tray sheet into the frame and secure with self-drilling tek screws through the front and rear of the sheet into items 1. Refer to diagram 5.
7. Weld items 8 in place.
8. Weld items 9 in position. The centre ones should be located in the centre of items 8 and spaced 50mm apart. The top face of items 9 should be flush with the tops of items 8 as shown in diagram 5. The two outer items 9 should be a couple of millimetres above the top edge of the tray sheet.
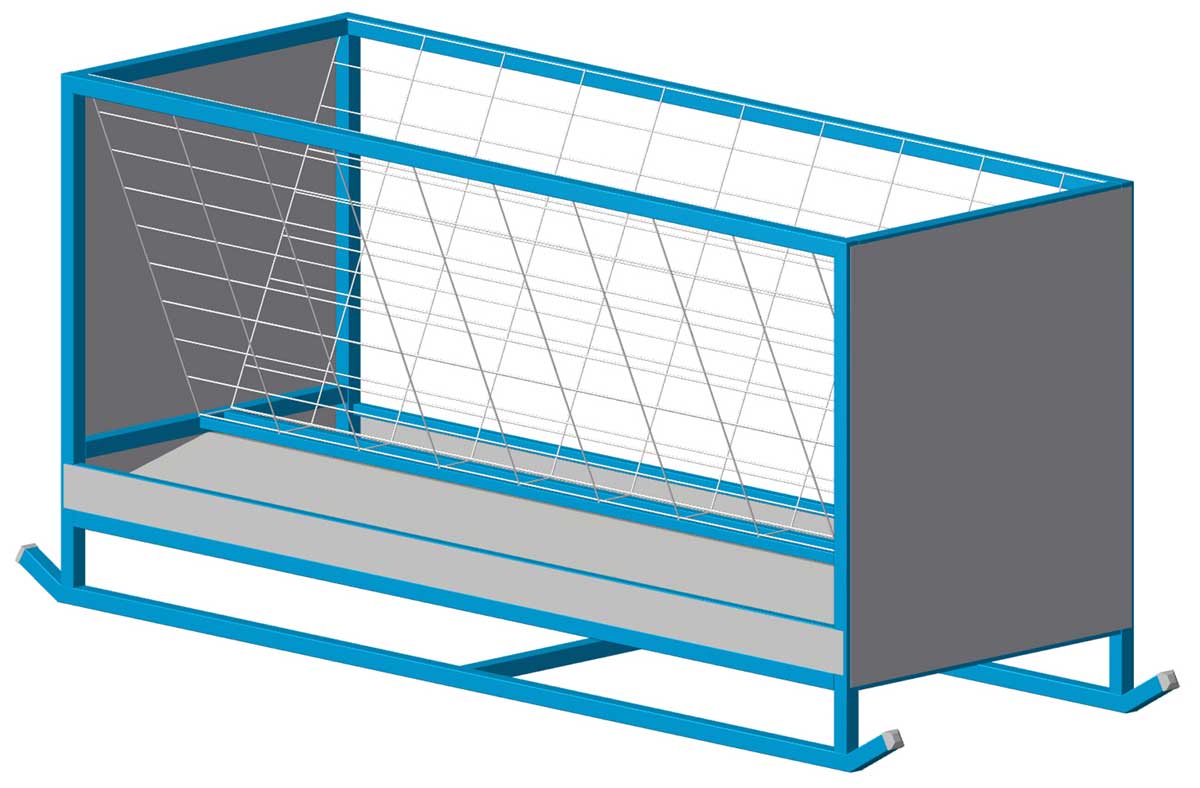
Diagram 6
9. Cut the mesh to size. The mesh can be sheep yard mesh or concrete reinforcing mesh. Weld the top edge of the mesh to items 4 and items 9 at the lower edge of the mesh. Refer to diagram 6.ersunk head bolts, washers and nuts.
10. Cut the sheets for the ends of the hay rack to size which should be 880mm x 1000mm. Install these in place using either pop rivets or self-drilling tek screws. Refer to diagram 6.
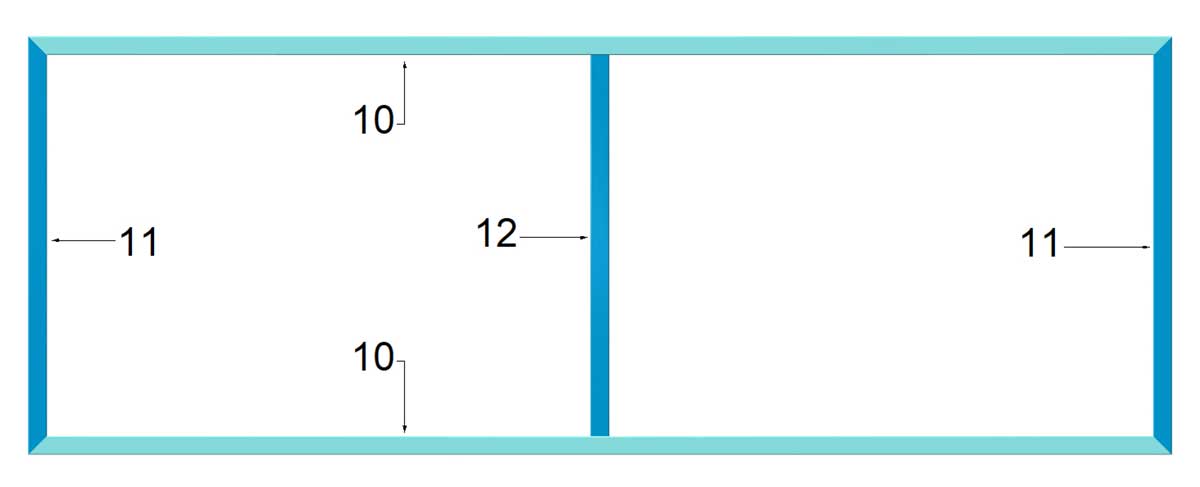
Diagram 6
11. Tack weld items 10,11 and 12 together to form the roof frame. Recheck that the frame is square and fully weld as shown in diagram 7.
12. Cut the sheet for the roof which should be 2440mm x 860mm. Secure the sheet to the roof frame using pop rivets or self-drilling tek screws.
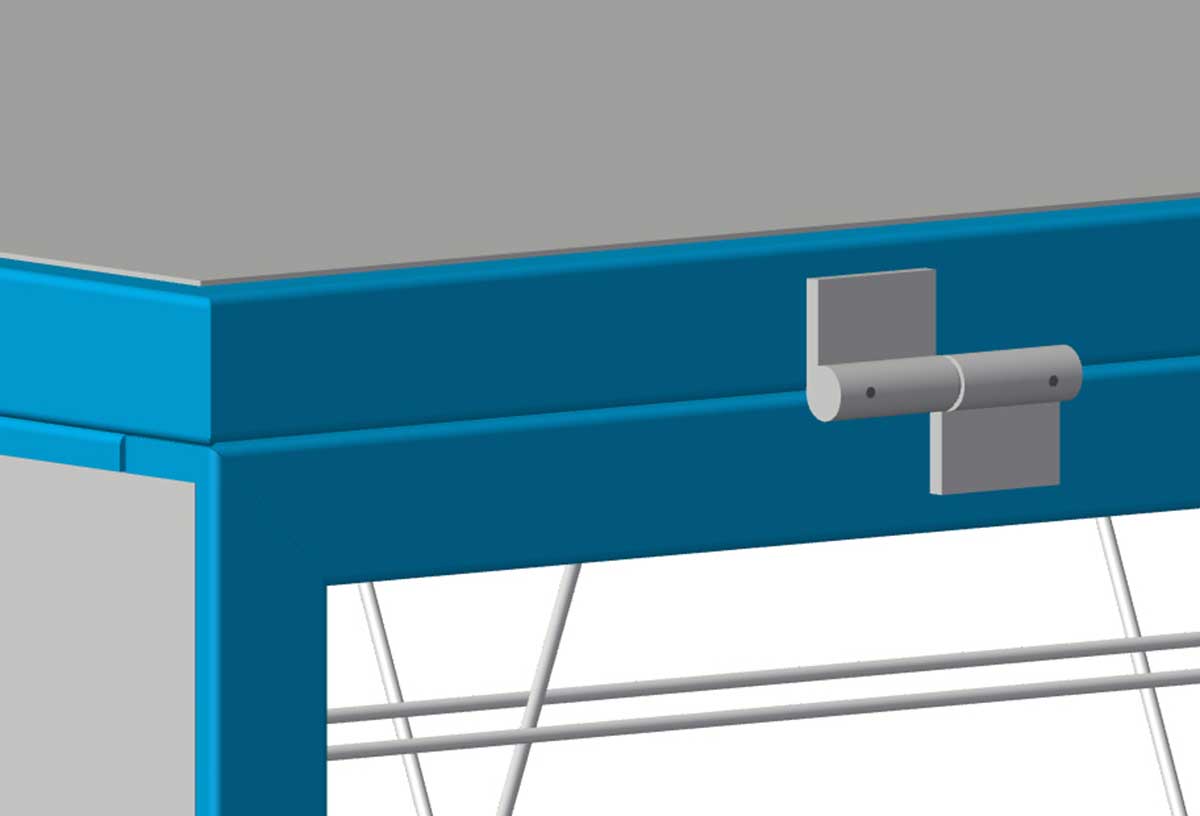
Diagram 6
13. Install the hinges. It is a good idea to make sure that the hinges that you use will not allow the roof the slide sideways and come off the hinge pins. The hinges shown are normally available in a left hand and a right hand version and are ideal for this purpose.
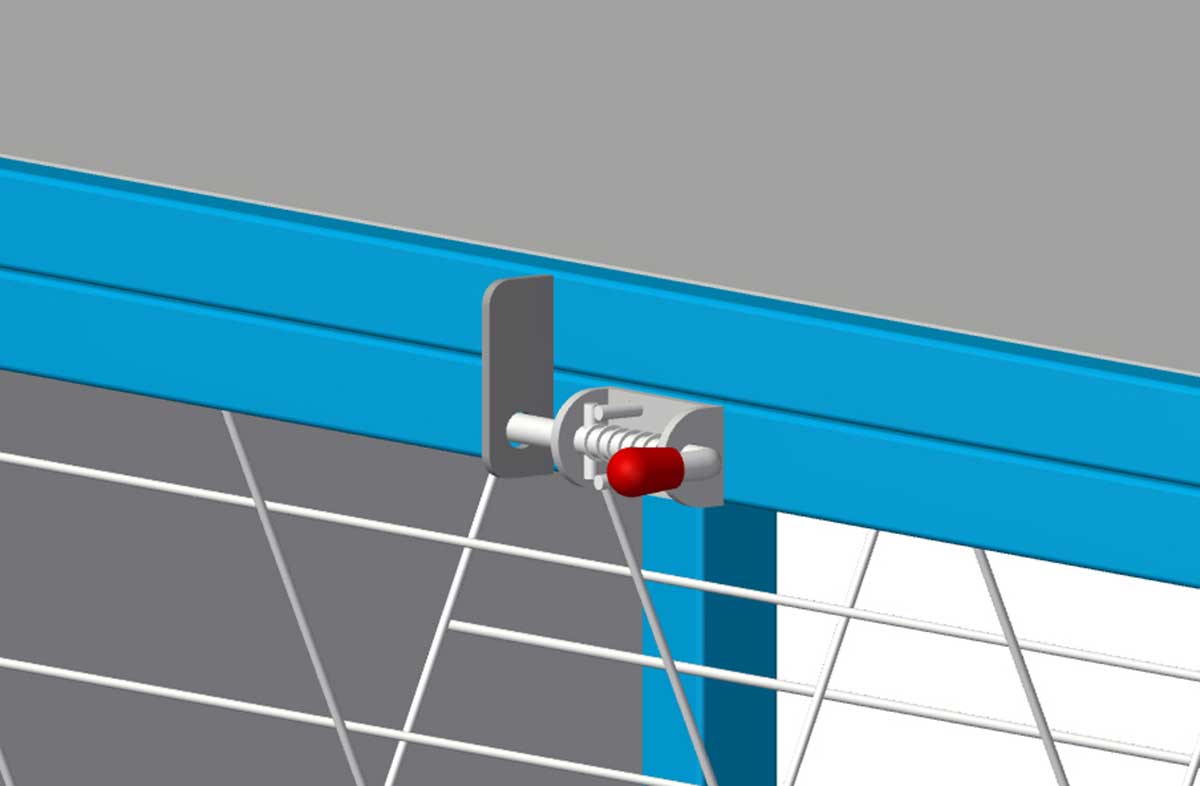
Diagram 6
14. Cut a piece of 32x5mm flat bat 80mm long and drill a 14mm hole approximately 20mm up from the bottom for the spring bolt pin.
15. Weld the flat bar and spring bolt in place as shown in diagram 9. The flat bar is welded to the roof frame whilst the spring bolt is welded to the hay rack frame.
16. Cut a piece of galvanised chain approximately 800mm long and weld one end to item 7 of the hay rack frame and the other end to item 11 of the roof frame. This is so that when the roof is open, it will not fall all of the way back.
17. Clean any welds using a grinding disc or flap disc and paint as required.