Steel Welding Table Plans


Free Welding Bench or Table Plans

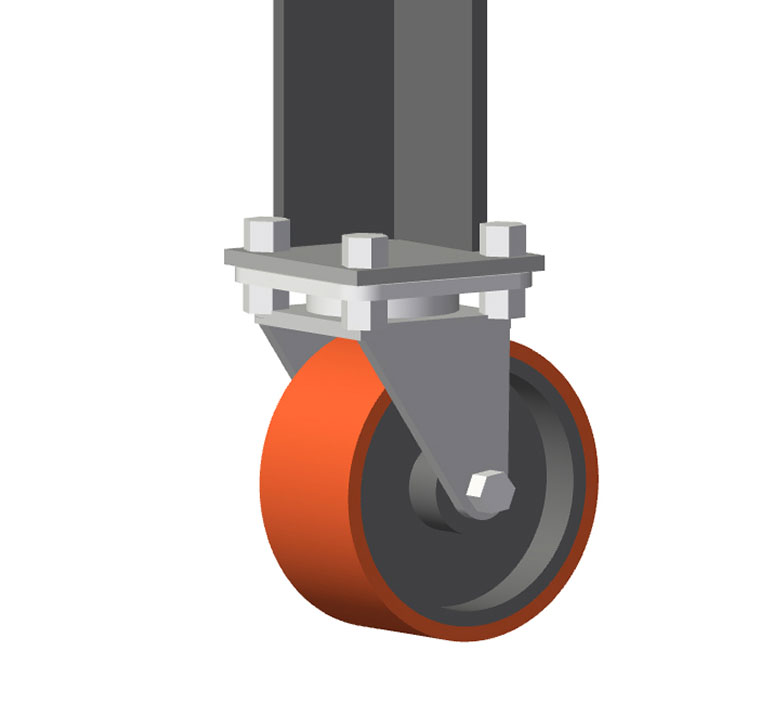
This metal welding bench or table is the ideal solution to build many of our farm welding projects. Having caster wheels, it is able to be moved around the workshop as needed.

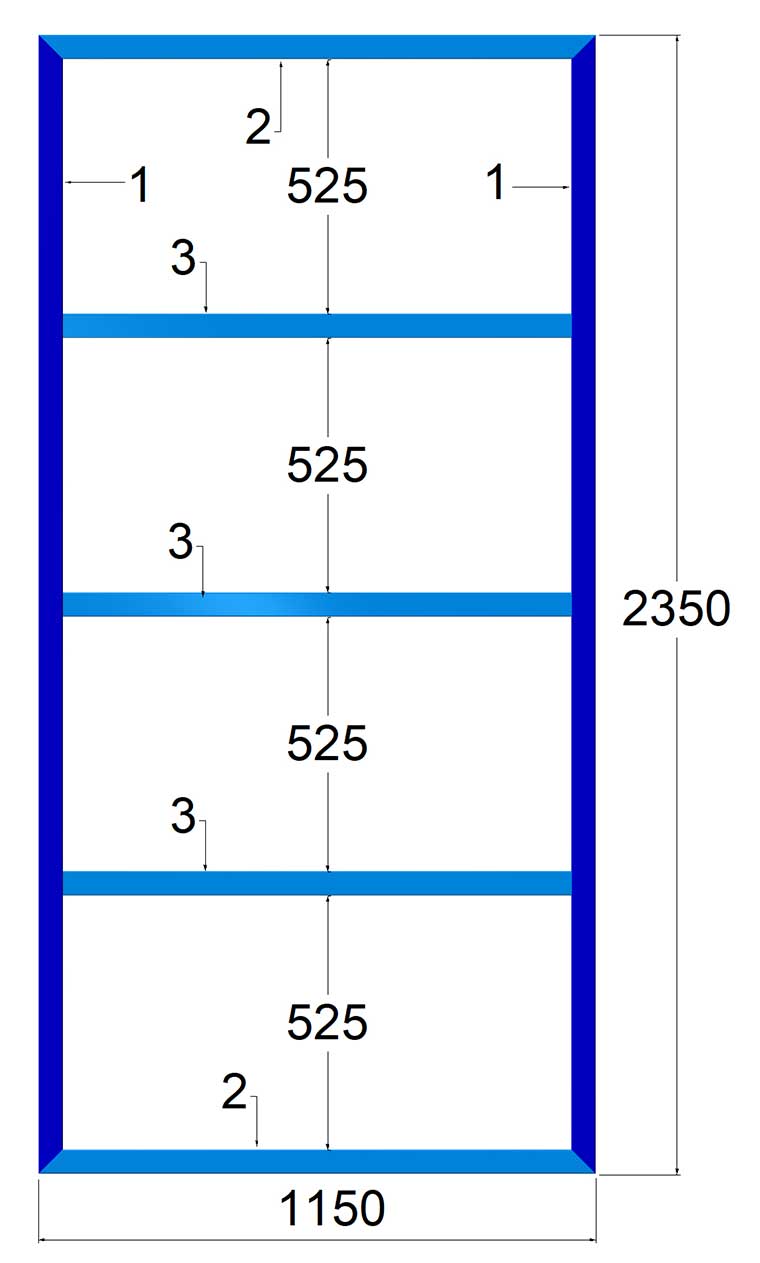
The dimensions suggested are: 2400mm long x 1200mm wide x approximately 900mm high. The steel shown in the cutting list is only a guide as you may have other material already available that you can use.

Materials Required
Item Number Material Length Quantity
1 75x50x2 RHS 2350mm 4
2 75x50x2 RHS 1150mm 4
3 75x50x2 RHS 1050mm 6
4 50x50x5 angle 775mm 4
  3mm black sheet 1200x2400mm 1
  1.5mm black sheet 1150x2350mm 1
welding bench table free plans

Diagram 1

1. Begin by cutting all of the steel as indicated in the cutting list. Label each with the item number on it using a marking pen and set aside. Make sure that the angles on items 1 and 2 are cut as shown in diagram 1.

2. Layout two of items 1, two of items 2 and three of items 3. Ensure that the frame is square and tack weld all items. Recheck for square and fully weld. Refer to diagram 1.

3. Repeat the above step for the lower frame.

welding bench table free plans

Diagram 2

4. Position one of the lengths of angle (item 4) at each of the corners on one of the frames. Place a few decent tack welds to hold them in position whilst completing the next step. The ends of the angle need to be flush with the top face of the upper frame. Refer to diagram 2.

5. Turn the assembly onto its side. Mark about halfway down the angle (or wherever you wish the shelf frame to be) and position the lower frame inside the four pieces of angle. Tack weld into place.

6. Check that the angle legs are square to the frames and fully weld.


welding bench table free plans

Diagram 3

7. Cut flat bar to suit your caster wheels and drill mounting holes as required.

8. Weld the caster wheel mounting plates to the ends of the angle legs and install the caster wheels. See diagram 3 for an example.

welding bench table free plans

Diagram 4

9. Cut the 1.5mm black sheet for the shelf as shown in diagram 4.

10. Position the previously cut sheet in position on the lower frame and place small welds approximately 300-400mm apart underneath the sheet to secure it to the frame.

11. Repeat the previous step for the 3mm sheet for the top of the welding table.

12. Using an angle grinder with a cutting disc fitted, cut a small radius on each corner of the top sheet so that there are no sharp corners.

13. Clean any welds using a grinding disc or flap disc and paint the frame as required.

User Comments

Just the plans that I've been searching for!

Going to build one for myself and one for my mate.

Leave a comment


© 2010 Kurraglen Industries All rights reserved