Free Tractor 3PL Carryall Plans


Free Tractor 3 Point Linkage Carry All Plans

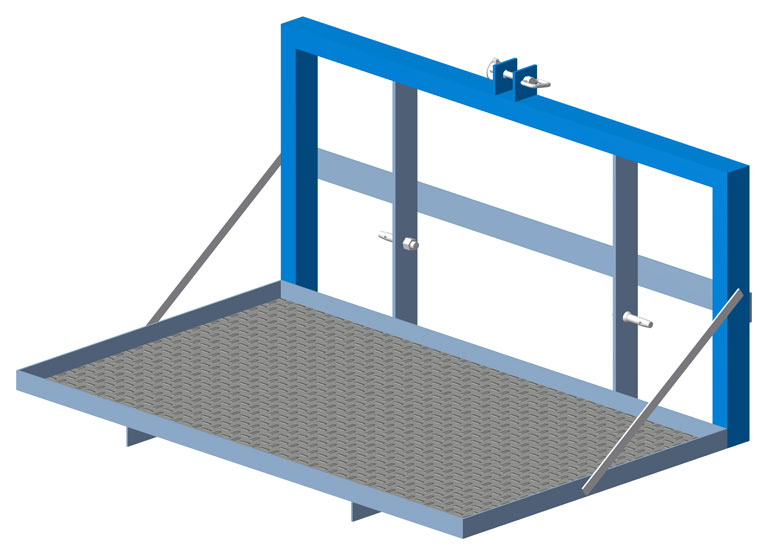
This carry all is useful for moving items around your farm such as a spray tank, fencing materials or tools or firewood, etc.

The steel shown in the cutting list is only a guide as you may have other material already available that you can use.

Note: If using timber for the floor, it is best to check the width of the timber you are going to use before cutting the angle for the floor to length to eliminate the need to rip the boards to fit.
Materials Required
Item Number Material Length Quantity
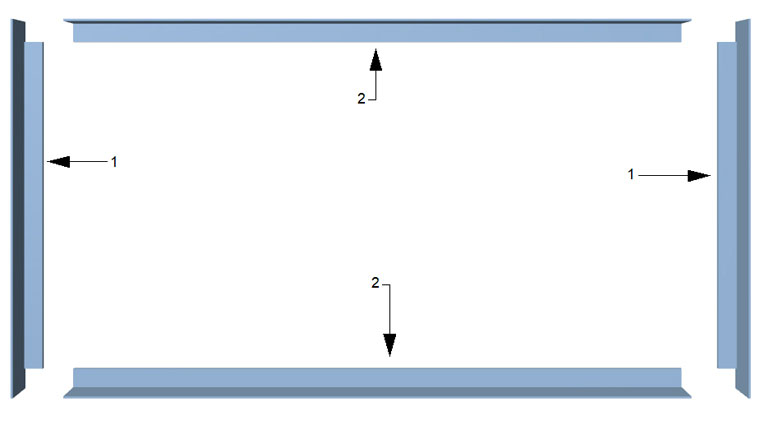
1 50x50x5mm angle 900mm 2
2 50x50x5mm angle 1490mm 2
3 50x5mm flat 975mm 2
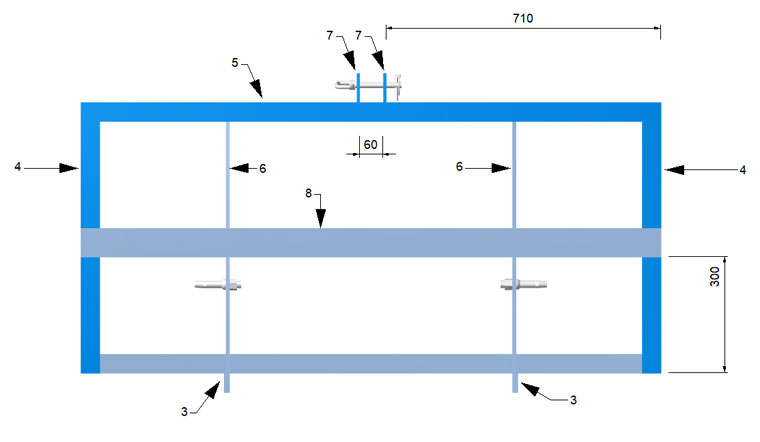
4 75x50x2.5mm RHS 700mm 2
5 75x50x2.5mm RHS 1500mm 1
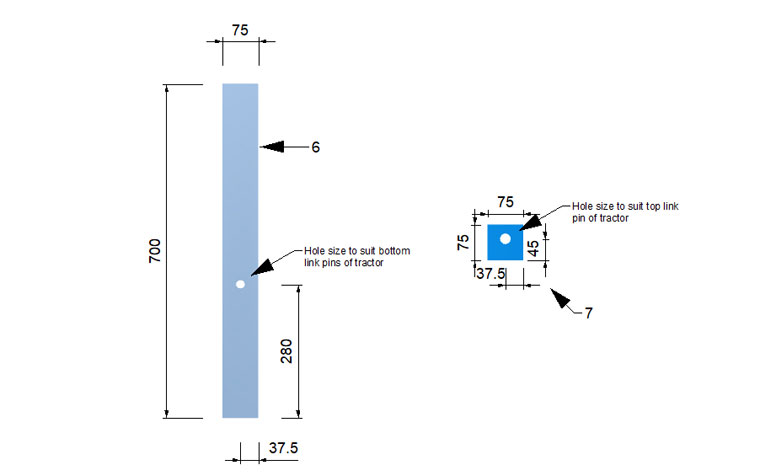
6 75x10mm flat 700mm 2
7 75x10mm flat 75mm 2
8 75x8mm flat 1500mm 1
9 25x5mm flat 650mm 2
  Lower 3 point linkage pins To suit your tractor 2
Upper 3 point linkage pin To suit your tractor 1
three point linkage carryall plans

Diagram 1

1. Begin by cutting the steel to the required sizes. Note that Items 4 have one 45 degree mitre cut on one end and Item 5 has a 45 degree mitre cut on both ends. Ensure that the mitre cut is done across the correct side. Refer Diagram 3.

2. Cut notches from the ends of items 1 as shown on Diagram 1 and tack weld together after checking that the frame is square. Fully weld frame.

tractor 3pl linkage carry all plans

Diagram 2

3. Position the 50x5 flat bar (Items 3) on the under side of the angle frame and weld into place as shown in Diagram 2.

tractor 3pl linkage carry all plans

Diagram 3

4. Tack weld Items 4 and Item 5 together at the mitre cuts.

tractor 3pl linkage carry all plans

Diagram 4

5. Drill holes in Items 6 to suit your tractors lower pins and Items 7 to suit the top pin of your three point linkage.


tractor 3pl linkage carry all plans

Diagram 5

6. Position the previously tack welded Items 4 and 5 as shown in Diagram 5 and tack weld.

7. Tack weld Items 6, Item 8 and Items 9 in place. Refer to Diagrams 5 and 6. Fully weld as required.

tractor 3pl linkage carry all plans

Diagram 6

8. Position Items 7 in place and weld as shown in Diagram 6.

9. Next, cut the floor to size. If using steel for the floor, this can either be welded in, screwed, bolted or riveted into place. If timber is used for the floor, fix using small countersunk head bolts, washers and nuts.

10. Grind any welds as required and paint.

User Comments

Love these plans. I needed a decent carryall but it seemed that all of the ones that I could find were cheap imports.

So glad I stumbled across these.

I built one of these for our small tractor which took me two weekends.

Very pleased with the end result.

Leave a comment


© 2010 Kurraglen Industries All rights reserved